
30 Days of Natural Inks – A Deep Dive into Botanical Color
30 Days of Natural Inks – A Deep Dive into Botanical Color
After discovering how easy it is to create ink using plants and food scraps, I never looked at anything the same way again. Suddenly, every leaf, berry, and kitchen scrap became a potential pigment, and the possibilities felt endless.
One of the most eye-opening experiences in my ink-making journey was challenging myself to create 30 different plant-based inks in 30 days. It was equal parts exciting, challenging, and surprising—some materials yielded rich, vibrant hues, while others faded or behaved in ways I never expected. Through this process, I deepened my understanding of natural color extraction and fell even more in love with the beauty of ink making.
If you're new to natural ink making and want to learn about basic techniques, tools, safety, and foraging, I recommend checking out this blog post first to build a strong foundation before diving into the recipes below.
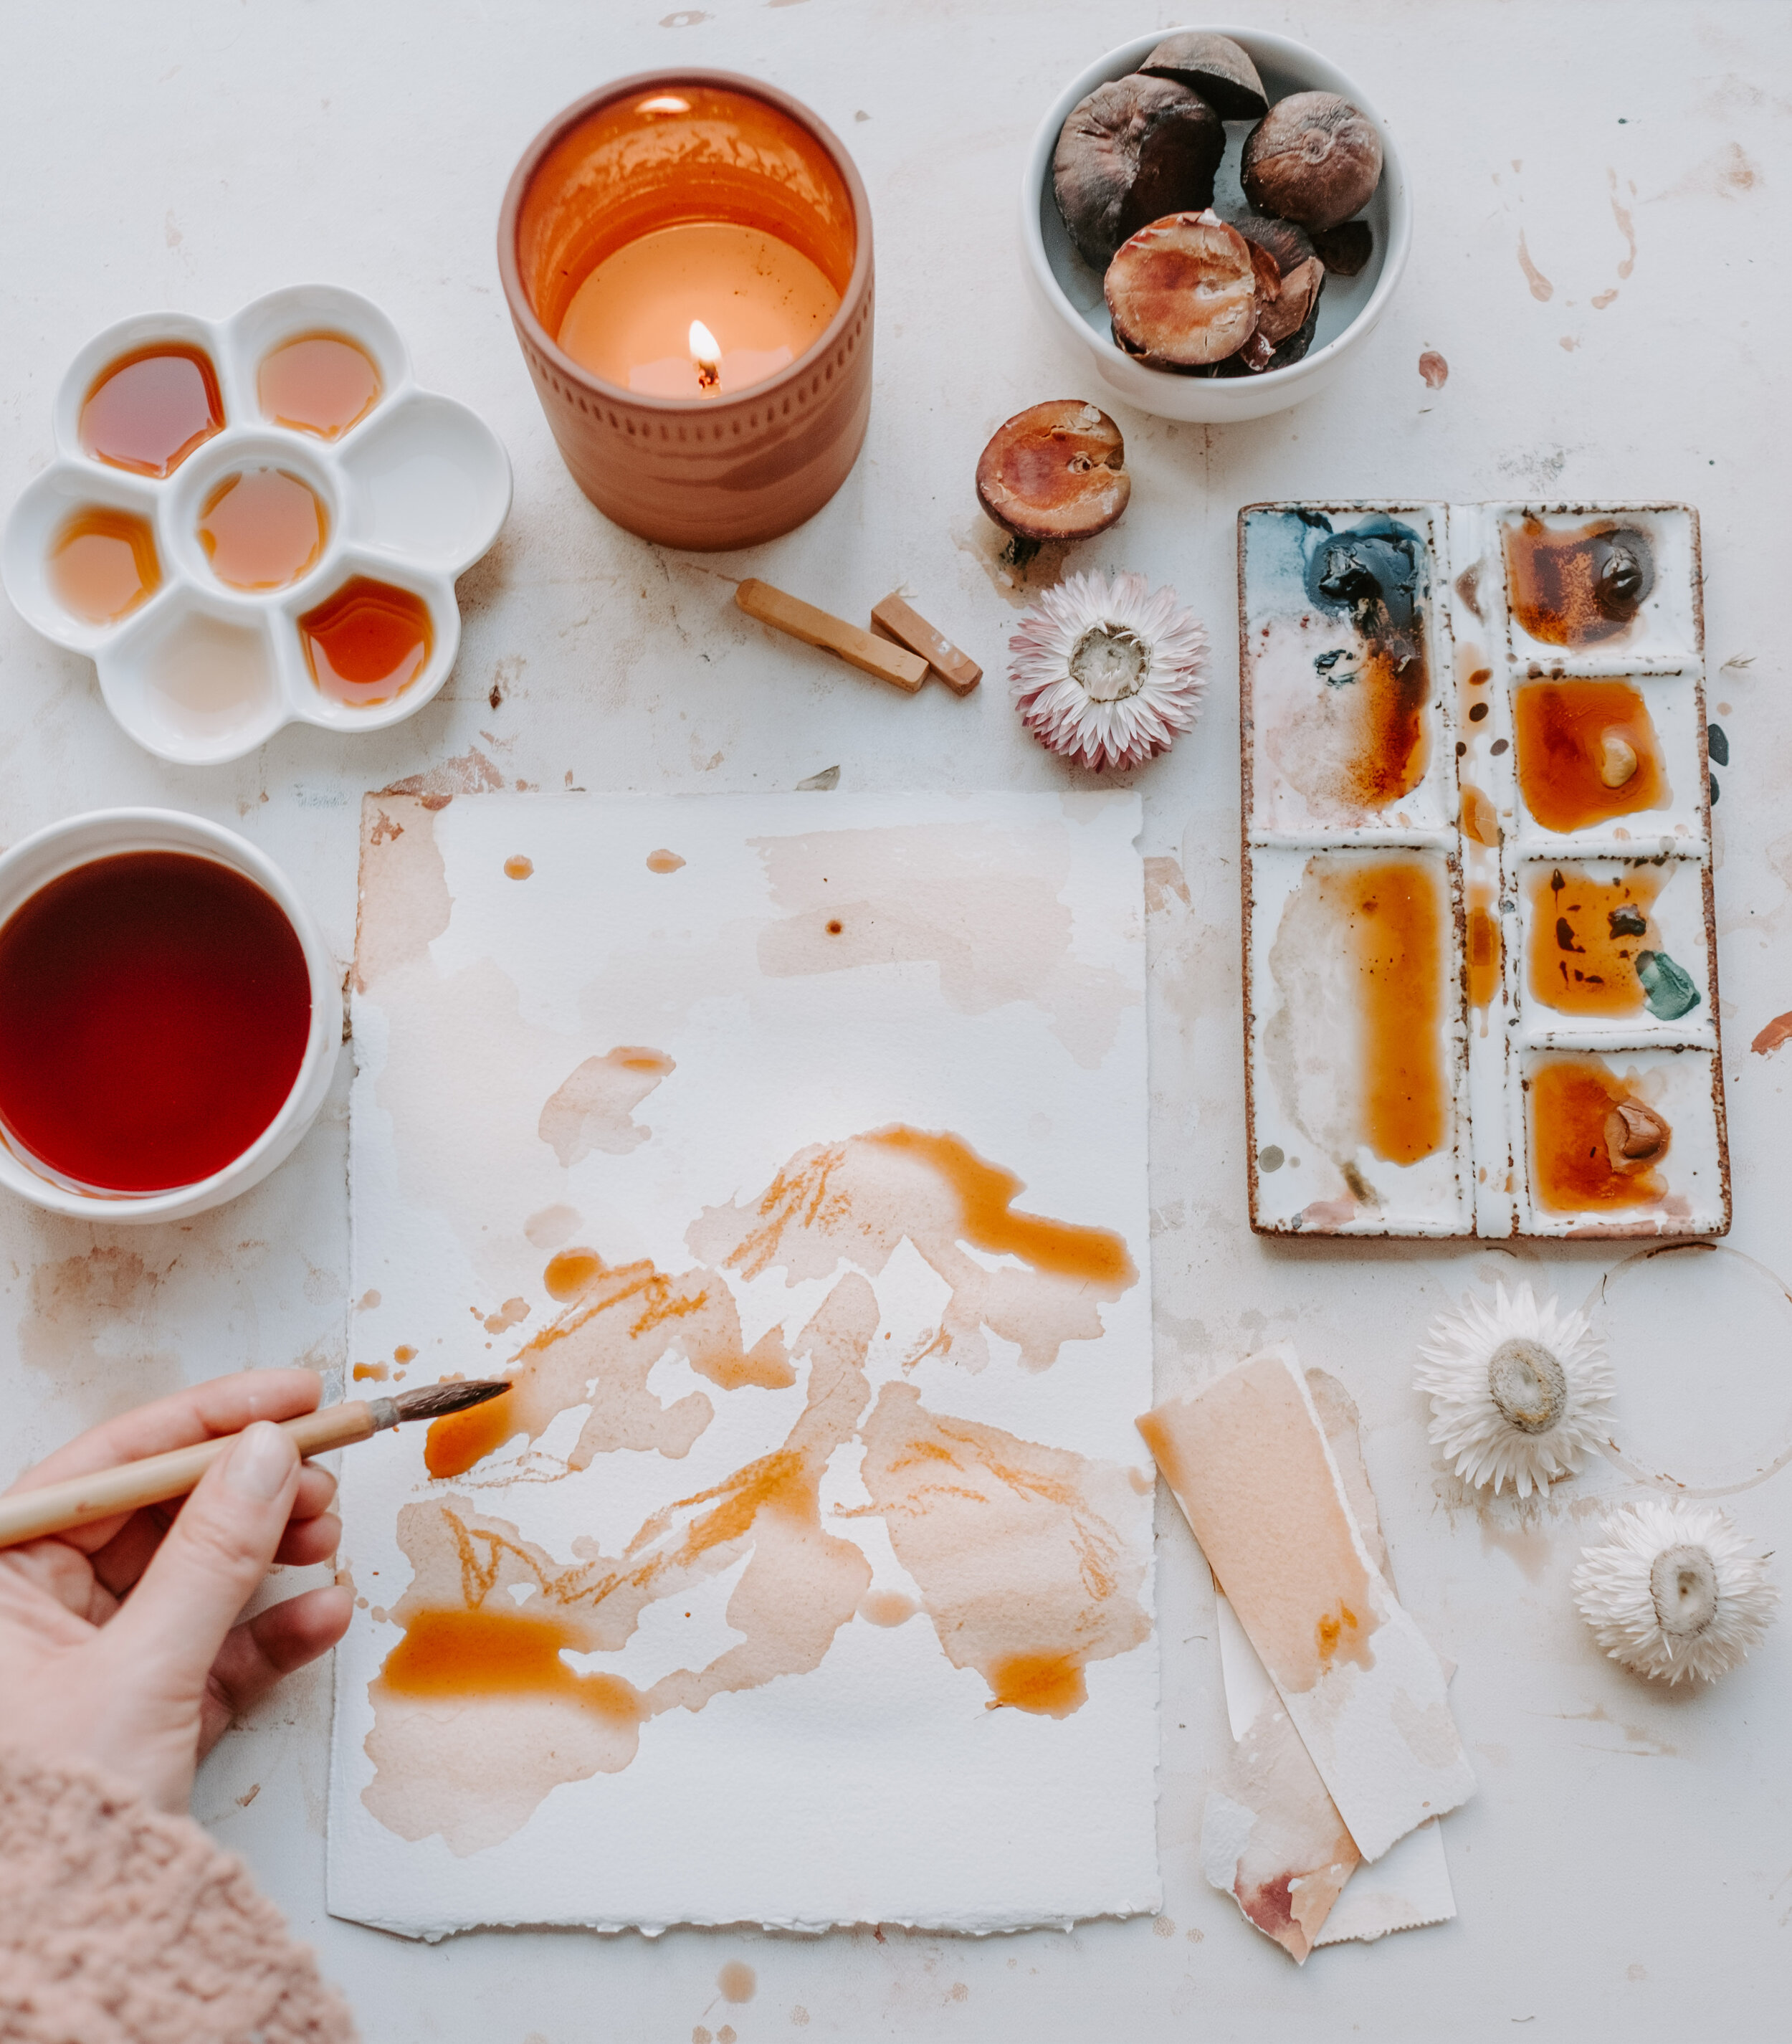
For those ready to experiment, let’s get into the basic ink-making recipe I followed throughout this challenge.
Basic Natural Ink Recipe
Step 1: Choose Your Plant Material
Identify your material, confirm its properties, and ensure it’s non-toxic.
Consider foraged plants, food scraps, or garden flowers for a wide range of colors.
Step 2: Prepare & Simmer
In a stainless steel pot, add your plant material and cover with water (a good ratio is 1 part plant material to 2 parts water).
Bring to a gentle boil, then add:
2 tablespoons white vinegar (to help release pigments)
1 tablespoon salt (to help with colorfastness)
Boil for a few minutes, then lower the heat to a gentle simmer, stirring occasionally.
Step 3: Monitor Color Development
Test color intensity by dipping a natural fiber paper strip every 10-15 minutes.
For soft materials (berries, flowers, leaves): Simmer for 15 minutes to 2 hours.
For harder materials (pits, bark, cones, nuts): Use a multi-day extraction—boil for 1 hour, let it cool overnight, then reheat the next day for another hour. Repeat if needed.
Step 4: Cool & Strain
Once your desired color is achieved, remove from heat and let cool.
Strain using a fine mesh strainer or cheesecloth. If plant particles remain, repeat the filtering process.
Step 5: Add Binder & Preservative
Pour the ink into a sterilized jar.
Add:
2 drops of Gum Arabic (to help the ink flow smoothly)
2 drops of Wintergreen or Thyme Oil (to prevent mold)
Shake well, and your ink is ready to use!
30 Days, 30 Inks
Throughout this challenge, I experimented with a variety of plant materials, each producing wildly different results. Some colors surprised me, others faded faster than expected, and a few became instant favorites.
Stay tuned—I’ll be sharing a breakdown of each ink, my discoveries, and how different modifiers shifted their colors. In the meantime, if you’re looking for supplies, ink extracts, or my go-to dye books, check out my Free Resource Guide for direct links to everything I use in my own ink-making practice.
Until then, happy experimenting, and may your ink adventures lead to beautiful surprises! ✨


day 1 - avocado stone ink
Both avocado stones and skins can produce a variety of colors ranging from peach to deep red. Color variation can depend on the type of avocado, origin, harvesting season and cooking time.
Following the Basic Recipe Above + Additional Steps
4-6 avocado stones
adding about 1 tbs soda ash (sodium carbonate) brings out the vibrancy of the color and shifts pH toward Alkali creating a longer lasting color. (gloves and a mask should be worn when working with soda ash)
You can create soda ash by baking - baking soda at 200 degrees F for an hour. Carbon dioxide and water will be given off, leaving dry sodium carbonate.cooking time: 2hrs, repeated the following day
day 2 - strawberry ink
Strawberries produce very pleasant taupe shades. The ink itself turned out fairly transparent, so I would recommend experimenting with shifting the pH and see which various shades and intensities can be produced.
Following the Basic Recipe Above + Additional Steps
2 cups of strawberries, stems included
mash using a potato masher to release more color compounds while simmering
cooking time: 3 hrs


day 3 - blueberry butterfly tea ink
The Tea Blend includes butterfly pea flowers, blueberries, lavender, rose hip and hibiscus. The color of the ink is very subtle pinkish blue. I loved styling this ink with the tea petals and letting the color of the ink blend into the tea particles, producing more bits of color.
Following the Basic Recipe Above + Additional Steps
2 cups of tea
cooking time: 2 hrs
day 4 - grape ink
Various grape types produce vibrant ink color. Wild grape is a common, high in tannin material for ink. I tried to experiment with a more green based ink and was pleasantly surprised with the outcome. The outer layer and the bright green center produced a beautiful coral ink color that dries into a soft pink.
Following the Basic Recipe Above + Additional Steps
2 cups of grapes
mash using a potato masher to release more color compounds while simmering
cooking time: 2 hrs


day 5 - red onion peel ink
If you are fan of saving food craps for soup stock like I am, then this ink is right up your alley. Onion peels are a common natural dye used for fabric, making it just as durable for creating inks. I keep a stash of dried peels in a paper bag for safekeeping. You can also find dried onion peels all around the bins when you pick out onions at your local produce market.
Following the Basic Recipe Above + Additional Steps
3 cups of onion peels
cooking time: 4 hrs, repeat for 30 mins the following day
day 6 - orange juice ink
Creating this ink was a fun experiment because the oranges themselves were not rich in color; but instead, the ink simply works as an acidic pH shifter. The ink brightens and changes other ink colors.
Following the Basic Recipe Above + Additional Steps
2 cups of orange fresh squeezed juice
cooking time: 2 hrs


day 7 - rosemary ink
Rosemary Ink filled my kitchen with such a pleasant smell. Rosemary much like other herbs are a common natural dye used for fabric, making it just as durable for creating inks.
Following the Basic Recipe Above + Additional Steps
3 cups of rosemary
cooking time: 4 hrs
day 8 - rosehip ink
The rosehips for this ink were foraged locally and dried for preservation. The smell is sweet and pleasant much like brewing rosehip tea.
Following the Basic Recipe Above + Additional Steps
3 cups of dried rosehips
cooking time: 4 hrs, repeat the following day


day 9 - blueberry ink
Blueberry Ink is hands down one of my favorite inks to create with. Every summer my mom and I go blueberry picking in the Alaskan mountains and fill our freezers with endless berries. These nostalgic memories always fill me with so much joy, especially now since I’m gathering for both art and food. Blueberries are high in tannins and are really fun to shift pH with. Try squeezing a lemon and watch the color beautifully transform.
Following the Basic Recipe Above + Additional Steps
2 cups of blueberries (defrosted or fresh)
mash using a potato masher to release more color compounds while simmering
cooking time: 30 mins
day 10 - beet ink
If beets are a common vegetable you cook with then you are definitely aware of how quickly your hands get stained. This of course is a great factor for ink making. Ink colors will vary on the type of beet and cooking time. I like to save beet scraps and store them in the freezer for ink, because my Russian heart craves Borscht on a monthly basis.
Following the Basic Recipe Above + Additional Steps
2 cups of beets
cooking time: 3 hrs


day 11 - spinach ink
Spinach is commonly used for fabric dying, so you can find a few different recipes that call for mordants like alum or iron. I didn’t test any color modifiers for this ink and it dried a bright yellowish green.
Following the Basic Recipe Above + Additional Steps
4 cups of fresh spinach
release color particles using a mortar and pestle or another mashing tool
cooking time: 1 hr
day 12 - calathea medallion ink
Since opening our plant shop That Feeling Co earlier year, I’ve loved testing a few non-toxic plants for ink. Calatheas are some of my favorite plants in general because they have these incredibly beautiful painterly patterns on the top and rich magenta coloring on the bottom of the leaves. I started gathering a few dead leaves as I pruned them and saved a few to experiment with. The color of the ink turned out to be a very vibrant hot pink, unlike any ink I’ve ever seen.
Please use caution and always be aware of plant toxicity before experimenting.
Following the Basic Recipe Above + Additional Steps
1 cup of dried out leaves
release color particles using a mortar and pestle or another mashing tool
cooking time: 1 hr


day 13 - yellow onion skins ink
If you are fan of saving food craps for soup stock like I am, then this ink is right up your alley. Onion peels are a common natural dye used for fabric, making it just as durable for creating inks. I keep a stash of dried peels in a paper bag for safekeeping. You can also find dried onion peels all around the bins when you pick out onions at your local produce market. I really enjoyed creating ink with both red and yellow onion skins. Th red seems a bit more of subtle brown orange, whereas the yellow peels definitely have more yellow undertones.
Following the Basic Recipe Above + Additional Steps
3 cups of onion peels
cooking time: 4 hrs, repeat for 30 mins the following day
day 14 - hibiscus tea ink
You might already know that I am a tea lover. Anytime I can create ink and enjoy a cup of tea from the same ingredient, I am all there! Hibiscus flowers are a common dye for fabrics, so you can find a few different recipes and modifiers for this ink.
Following the Basic Recipe Above + Additional Steps
2 cups of hibiscus tea
cooking time: 1 hr


day 15 - eucalyptus ink
I often wish that I lived in a place where Eucalyptus grows wild. But it’s ok, Alaska is special in many other ways:) Eucalyptus branches dry so beautifully, I love creating dried arrangements with it around my home. Aside from it being used wildly in the floral design world, it’s also commonly used in fabric dying because the leaves are rich in tannin compounds. You can find many different recipes and modifiers for using Eucalyptus.
Following the Basic Recipe Above + Additional Steps
3 cups of dried leaves
cooking time: 4 hrs, repeat the following day
day 16 - mint ink
Mint is commonly used for fabric dying so you can find a few different types of recipes that call for mordants like alum or iron. I didn’t add any color modifiers for this ink and it dried a beautiful peach tone.
Following the Basic Recipe Above + Additional Steps
4 cups of fresh mint
release color particles using a mortar and pestle or another mashing tool
cooking time: 1 hr


day 17 - tulip ink
Creating ink with floral petals can be tricky because the petals are so delicate. The color can turn brown very quickly if the material is overcooked. It is recommended that you either simply cover the petals in hot water or simmer on very low heat when extracting color for ink.
Following the Basic Recipe Above + Additional Steps
2 cups of tulip petals
release color particles using a mortar and pestle or another mashing tool
cooking time: 1 hr (low simmer only)
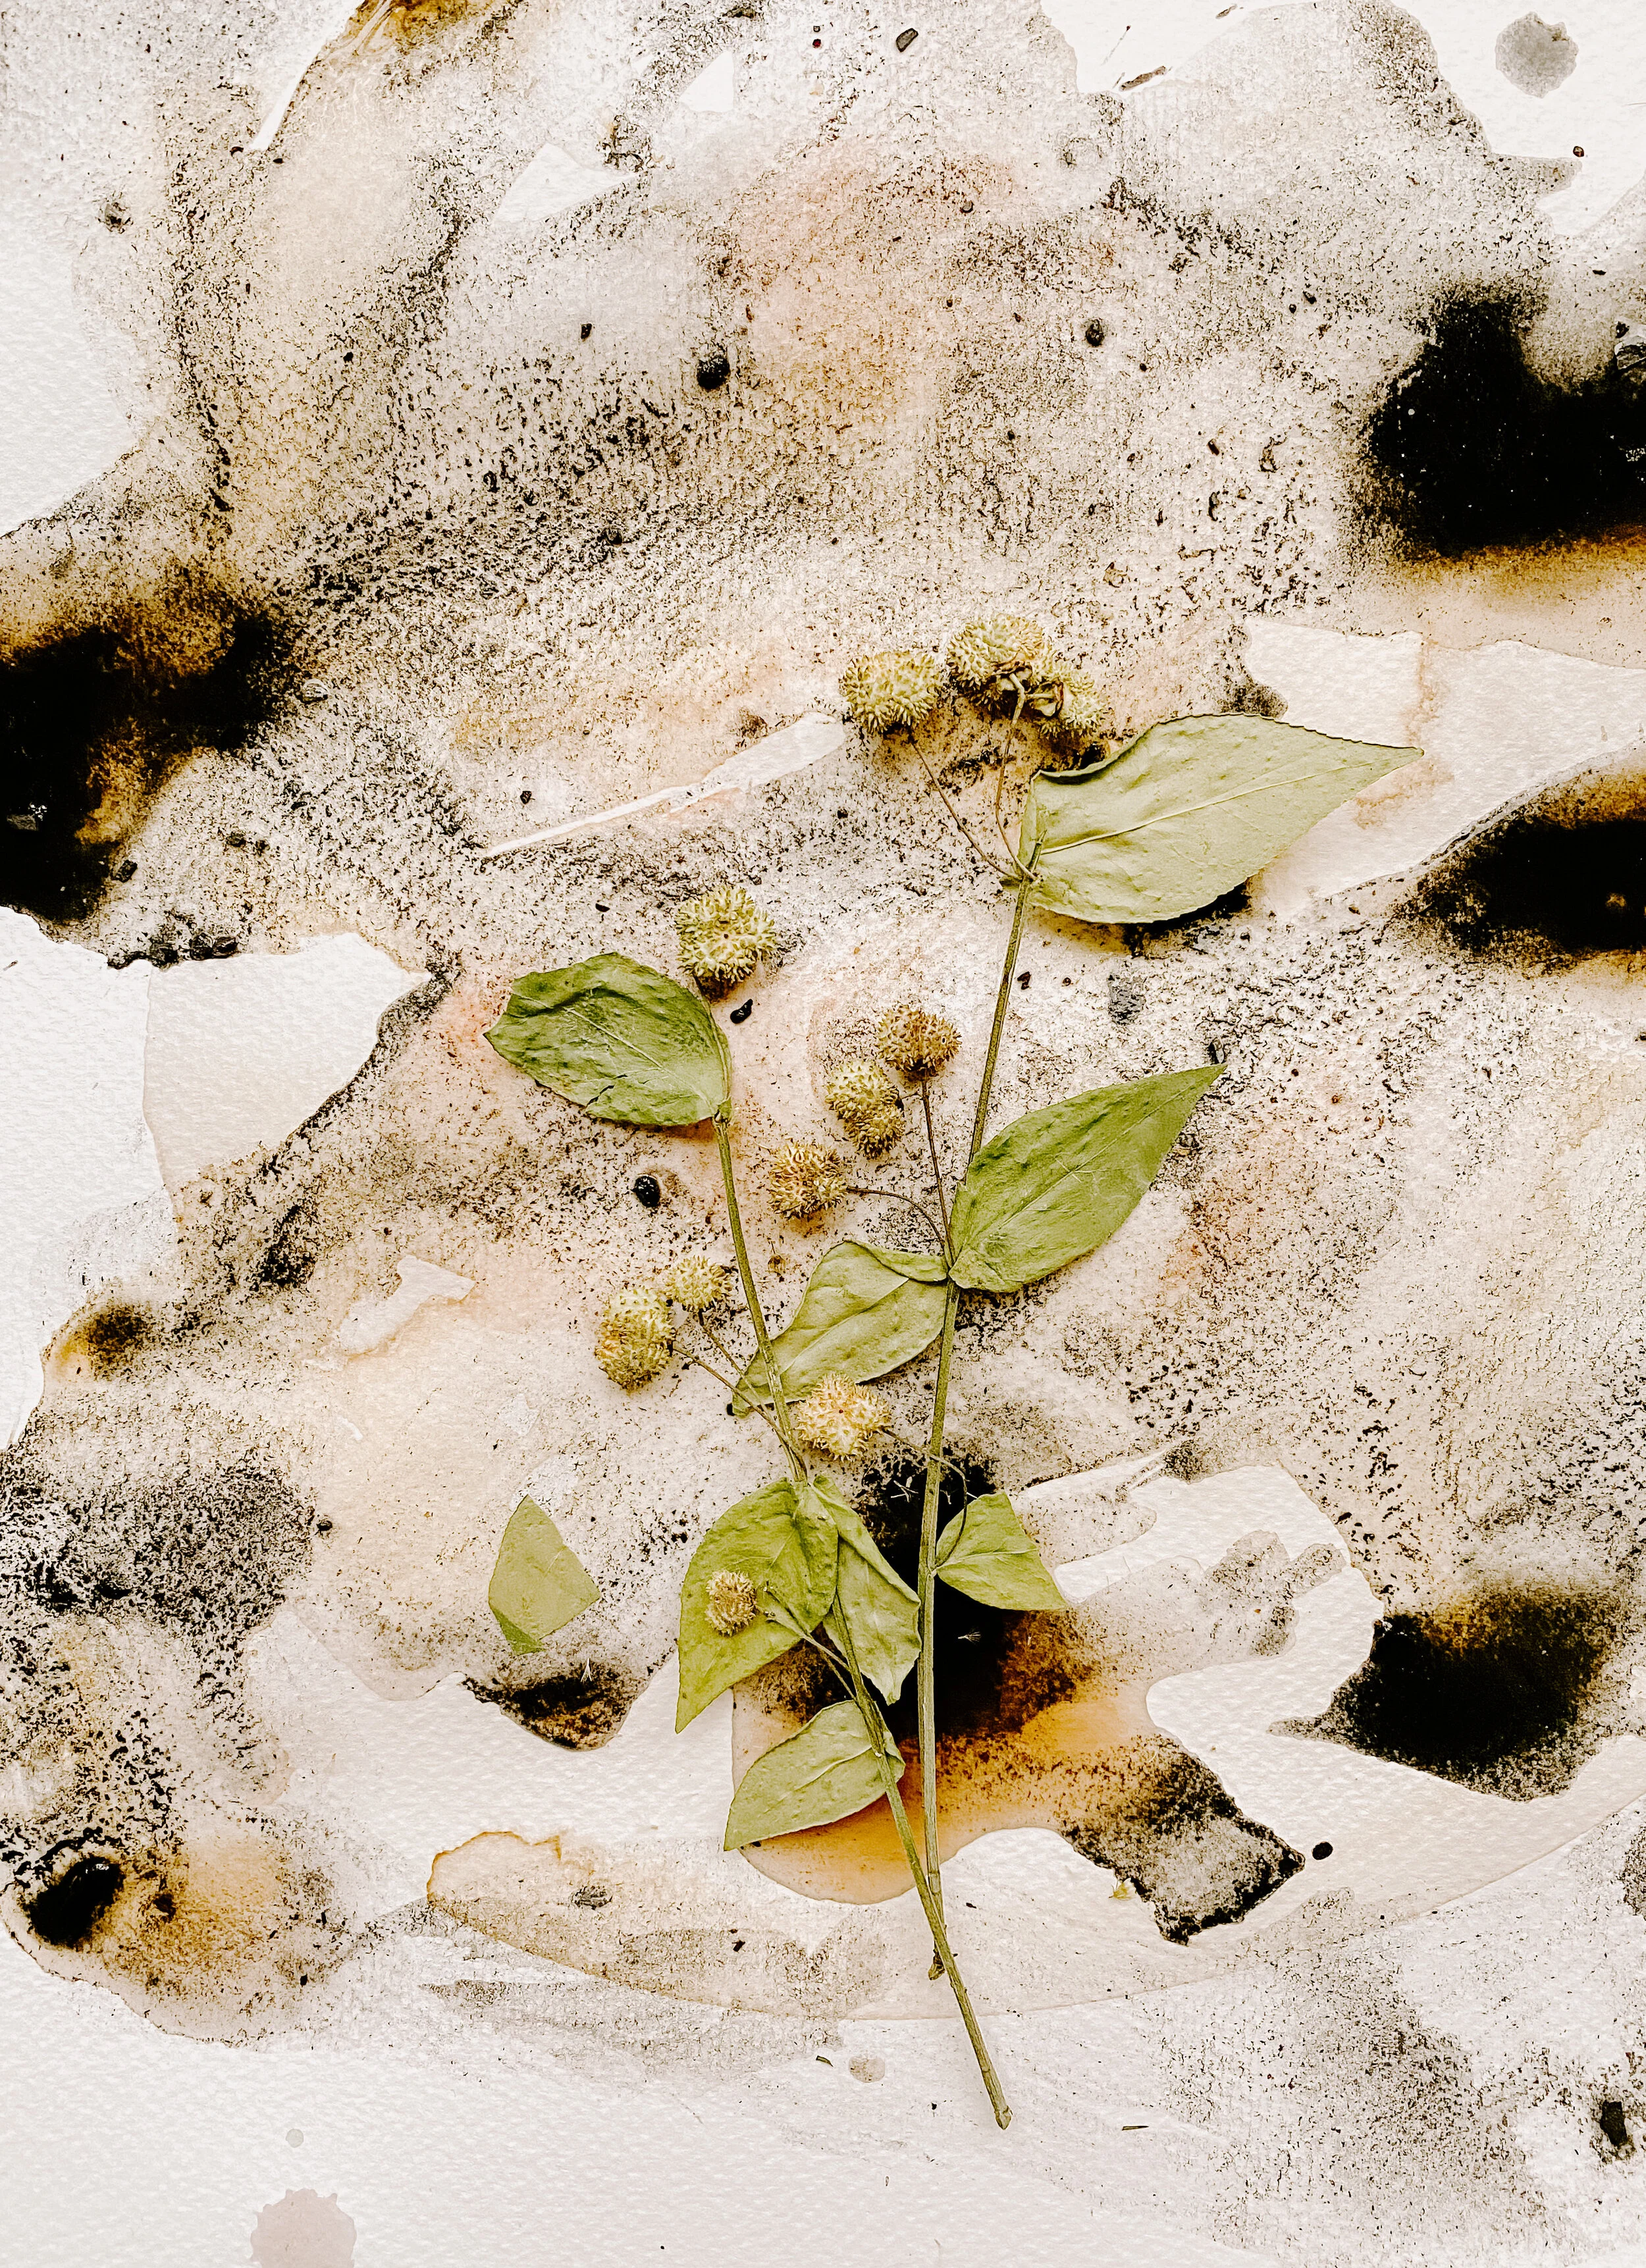
day 18 - charcoal ink
I loved creating this ink because it was so quick and easy. This rich carbon black was created using birch soot from my fireplace. Color presence was pretty much immediate after simply adding hot water and mashing with mortar and pestle. There are few different recipes you can find that create this rich charcoal color. Some recipes call for rubbing alcohol some for vinegar. I stuck with the basic recipe with the exclusion of cooking it down on the stove.
Following the Basic Recipe Above + Additional Steps
1 cups of soot
release color particles using a mortar and pestle or another mashing tool
cooking time: none

day 19 - red currant ink
Red currant is another berry my mom and I forage for in the summer months. Currants make a lovely tea too.
Following the Basic Recipe Above + Additional Steps
2 cups of red currants (defrosted or fresh)
mash using a potato masher to release more color compounds while simmering
cooking time: 30 mins
day 20 - purple cabbage ink
Purple cabbage is a common natural dye used for fabric, making it just as durable for creating inks. The color of the ink is bright magenta that dries into a very lovely light blue.
Following the Basic Recipe Above + Additional Steps
2 cups of sliced purple cabbage
mash using a potato masher to release more color compounds while simmering
cooking time: 4 hrs, repeat for 30 mins the following day


day 21 - turmeric ink
Turmeric was another super accessible and quick ink to create. I used turmeric powder from my spice drawer and simply suspended it in hot water for about 30 mins. Color vibrancy is pretty much immediate. Turmeric is a common fabric dye so you can find a few different recipes to experiment with.
Following the Basic Recipe Above + Additional Steps
1/2 cup of turmeric spice
cooking time: none
day 22 - coffee ink
This ink was created from coffee ground waste. I simply saved about 4 pockets of coffee filters filled with coffee and soaked them all for a full day. It was really rewarding to reuse something that otherwise would of been tossed.
Following the Basic Recipe Above + Additional Steps
3 cups of used coffee grounds
cooking time: none


day 23 - blackberry ink
Just like the other berries I created ink with, blackberries produce color almost immediately after being suspended in water. These berries are high in tannins and are really fun to shift pH with. Try squeezing a lemon and watch the color beautifully transform.
Following the Basic Recipe Above + Additional Steps
2 cups of blackberries (defrosted or fresh)
mash using a potato masher to release more color compounds while simmering
cooking time: 30 mins
day 24 - fireweed leaf ink
This ink is really special to me because the leaves were foraged by my mom. With the intention of being used for tea of course, but I simply couldn’t help myself with experimenting. The original ink color turned out to be a soft yellowish peach, but with addition of soda ash the color truly shined. This deep yellow green is now one of my favorites to paint with.
Following the Basic Recipe Above + Additional Steps
2 cups of dried fireweed leaves
adding about 1 tbs soda ash (sodium carbonate) brings out the vibrancy of the color and shifts pH toward Alkali creating a longer lasting color. (Gloves and a mask should be worn when working with soda ash)
You can create soda ash by baking - baking soda at 200 degrees F for an hour. Carbon dioxide and water will be given off, leaving dry sodium carbonate.cooking time: 3 hrs, repeat the following day


day 25 - sumac ink
Sumac is a spice I love cooking with. This particular batch traveled with me from Jerusalem about 4 years ago. I can still remember walking through the market in search of spices to bring home when I stumbled upon a store front with mountains of spices of all colors and scents. I was in heaven. If you haven’t tasted sumac before, it has a bit of acidity to it and works perfect for bringing out certain flavors. Sumac also grows wild in certain regions of North America and can be foraged. Please be careful not to confuse sumac with poison sumac. The difference between poison and harmless sumac is most noticeable in the berries on the two plants. Poison sumac has clusters of white or light-green berries that sag downward on its branches, while the red berries of harmless sumac sit upright.
Always, always verify plants when foraging.
Following the Basic Recipe Above + Additional Steps
1 cup of sumac spice
cooking time: 3 hrs
day 26 - artichoke ink
This ink was created simply because we were cooking artichokes one night and I got curious. I saved the liquid after one hour of boiling the artichokes, reboiled the liquid alone the following day with the steps below. The color turned out to be a bit more transparent than I had hoped so I added soda ash to see if I can coax more color out of it and I’m so glad I did.
Following the Basic Recipe Above + Additional Steps
4 artichokes
adding about 1 tbs soda ash (sodium carbonate) brings out the vibrancy of the color and shifts pH toward Alkali creating a longer lasting color. (Gloves and a mask should be worn when working with soda ash)
You can create soda ash by baking - baking soda at 200 degrees F for an hour. Carbon dioxide and water will be given off, leaving dry sodium carbonate.cooking time: 1 hr, repeat the following day


day 27 - eggplant peel ink
Eggplant peels were a food waste I had saved in the freezer for future experiments. The color of the ink turned out to be a soft light brown, so I added soda ash to see if I can get any more color/vibrancy from it. The result was a surprising bright blue hue.
Following the Basic Recipe Above + Additional Steps
2 cups of eggplant peel
adding about 1 tbs soda ash (sodium carbonate) brings out the vibrancy of the color and shifts pH toward Alkali creating a longer lasting color. (Gloves and a mask should be worn when working with soda ash)
You can create soda ash by baking - baking soda at 200 degrees F for an hour. Carbon dioxide and water will be given off, leaving dry sodium carbonate.cooking time: 3 hrs, repeat the following day
day 28 - rose ink
I started saving dried petals/flowers, branches and textures about a year into my floral design career. I would repurpose unused materials for holiday wreaths and other floral events. Now 4 years later, I’ve stepped away from doing floral design work, but the same principles of reusing and repurposing apply anytime I have florals around. The rose petals have been dried and kept in a brown paper bag until use. Avoid storing dried goods in plastic bags because it can create mold. Similar to creating ink with other flower petals, try to simmer on low heat or suspend in hot water to avoid color burning.
Following the Basic Recipe Above + Additional Steps
2 cups of dried rose petals
cooking time: 3 hrs


day 29 - blood orange ink
The color of the blood orange juice was so fascinating and vibrant, I had to experiment with it. I expected the color would work much like the regular orange, but to my surprise the results were very different. The ink color itself is a bright reddish orange, when the ink dries it turns almost turquoise. Magic!
Following the Basic Recipe Above + Additional Steps
4 cups of blood oranges (Peels included)
mash using a potato masher to release more color compounds while simmering
cooking time: 2 hrs
day 30 - gooseberry ink
To end the 30 day challenge, I had to create ink with another foraged favorite - gooseberry! The color of the ink is bright reddish orange that dries into almost a lavender pink. I love the cool hues in this ink.
Following the Basic Recipe Above + Additional Steps
2 cups of gooseberries (defrosted or fresh)
mash using a potato masher to release more color compounds while simmering
cooking time: 30 mins

I started this challenge at the beginning of April, right when covid-19 quarantine began. I loved challenging myself with creating a new ink daily. As you might of noticed some inks take up to 2 days to complete so I always had 2-3 inks cooking at once. Whether it was an ink that I had previously researched or material I was simply willing to experiment with, the results were always truly rewarding. The entire challenge is also in my Instagram Highlights (click here) where you can find more visuals of the process. My obsession with foraging, color and plants grew a little stronger over these 30 days. Creating color with things as accessible as food waste to berries in my freezer, natural color is truly at your fingertips.
These recipes are not final and I will probably be tweaking them in the future, but having a basic recipe in place is always a great start. There are various shades you can achieve with each original color by documenting experimentations/swatches, shifting pH, and adding modifiers/mordants. The possibilities and colors are truly endless.
Aside from creating daily inks, I loved photographing and styling for this challenge. It was important for me to document each day, its beautiful results and the simplicity of slowing down and appreciating what is around me.
I deeply hope this challenge inspires you to look at nature with a more vibrant and abundant perspective. Color is truly all around us.
For safety, foraging, tools and how to get started - check out this post.